Android IMAP Email Setup Guide
The following guide should help you make your way through setting up Android. This guide will work with any Android device. There may slight be differences between my images and your phone. If you have any trouble, please don’t hesitate to let us know and we’ll be happy to walk you through it.
Username: Full email address (example: bob@drbob.com)
Hostname: secure.emailsrvr.com
Incoming Port: 993
Outgoing Port: 465
SSL: Enabled
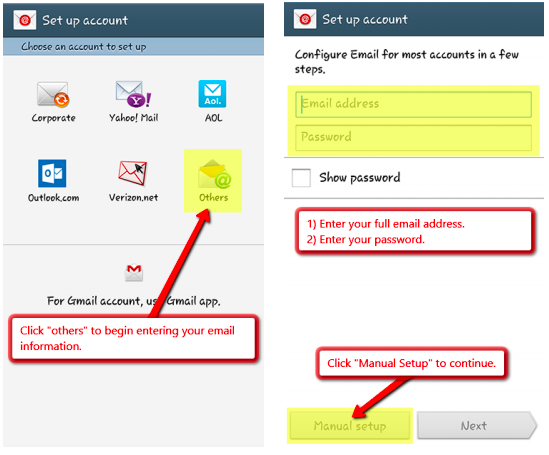
Step 1: Set Up Account
Choose “Others” to begin entering your email information. Be sure to enter your full email address and password. Then choose “Manual Setup” to continue.
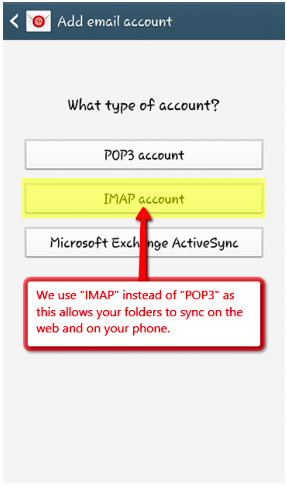
Step 2: Add Email Account
We use IMAP accounts instead of POP3 accounts. The difference between the two accounts is significant.
With a POP3 account, you can only view your email in one location, as it will download all of that email from the server to your computer or phone. With an IMAP account, all of your email syncs with the server continuously, so email can be checked from multiple sources.
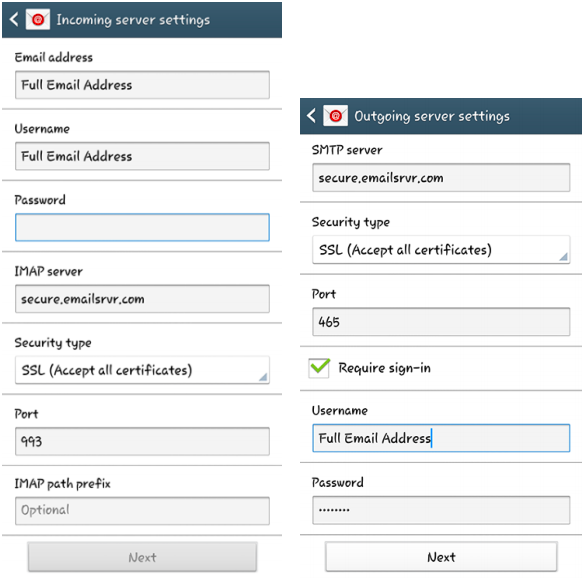
Step 3: Incoming & Outgoing Server Settings
Your phone should look very similar to the images below. Please ensure that you include your full email address whenever it says Email Address or Username.
Username: Full email address (example: bob@drbob.com)
Hostname: secure.emailsrvr.com
Incoming Port: 993
Outgoing Port: 465
SSL: Enabled
Step 4: Account Options
Choose the amount of time you would like to sync email for and your sync schedule. Make sure Sync Email is selected. Provide a name for your email account, then click Next to finish the setup process.
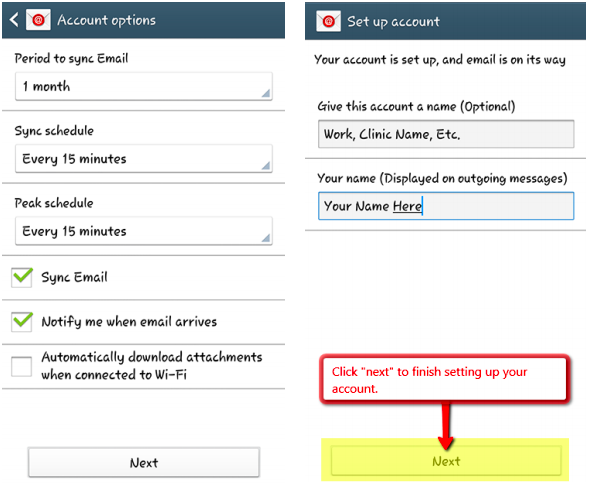
Congratulations! You have completed the setup of your email account!

Still have questions? Don’t hesitate to call or contact us at support@perfectpatients.com. We look forward to hearing from you!