iPhone & iPad IMAP Email Setup Guide
The following guide should help you make your way through setting up email on an iPhone or iPad. There may be slight differences between my images and your phone or iPad. If you have any trouble, please don’t hesitate to let us know and we’ll be happy to walk you through it.
Username: Full email address (example: bob@drbob.com)
Hostname: secure.emailsrvr.com
Incoming Port: 993
Outgoing Port: 587 (sometimes 465 if outgoing mail is not working).
SSL: Enabled
Step 1: Set Up Account
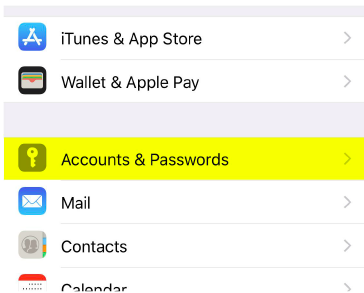
Click the Settings button on the homepage of your iPhone or iPad.

Scroll down and click Accounts & Passwords.
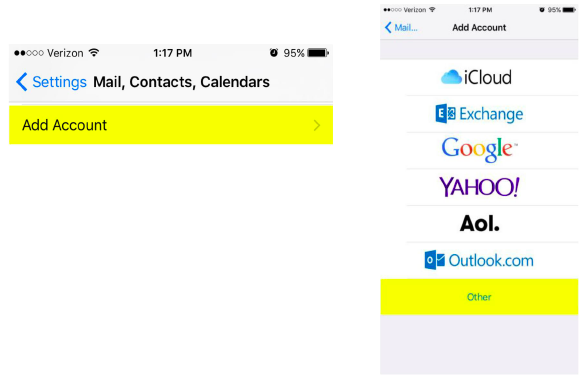
Step 2: Add Email Account
On the next screen, select Add Account, followed by Other.
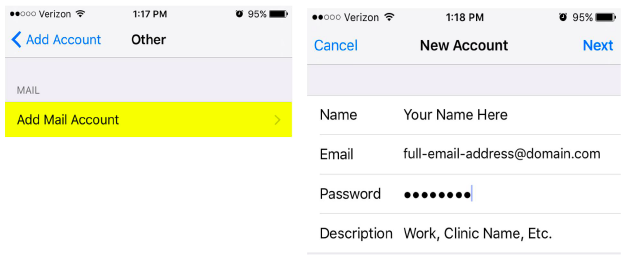
Select Add Mail Account. Fill out the New Account information using your email address & password.
Step 3: Setting Up Server Information
Username: Full email address (example: bob@drbob.com)
Hostname: secure.emailsrvr.com
Note: Under Outgoing Mail Server, it says that your Host Name and Username are Optional, these boxes are NOT optional. Please provide your full email address as your User Name and your password.
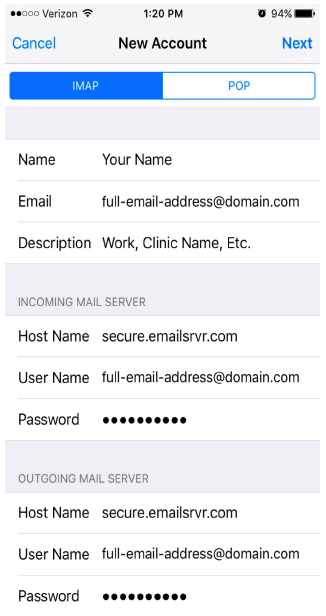
Click Next then Save.
(Mail should be green, Notes should be White unless you want to sync them).
Step 4: Check Your Ports
Username: Full email address (example: bob@drbob.com)
Hostname: secure.emailsrvr.com
Incoming Port: 993
Outgoing Port: 587 (sometimes 465 if outgoing mail is not working).
SSL: Enabled.
You should now see your new mailbox:
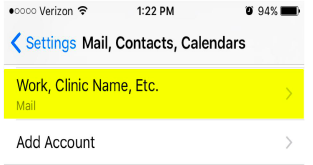
Click on your new mailbox, and then the account:
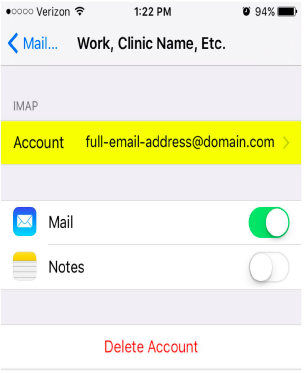
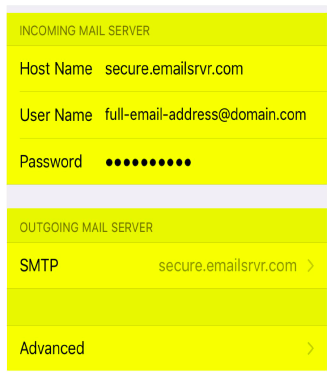
On the account page, scroll down until you see Incoming Mail Server and Outgoing Mail Server.
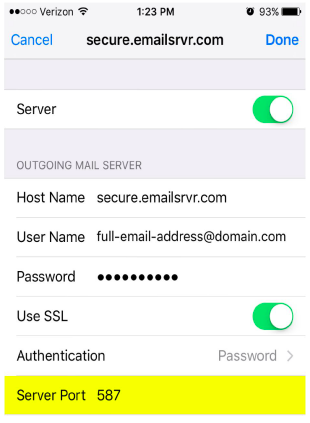
You will need to click on SMTP to check the Outgoing Mail Server Ports.
On the SMTP page, select the Primary Server button.
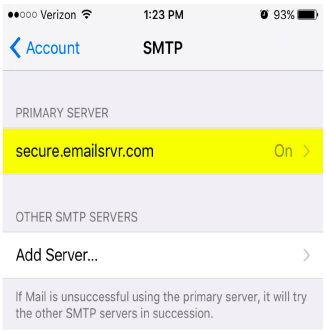
Check to make sure that the server port is 587.
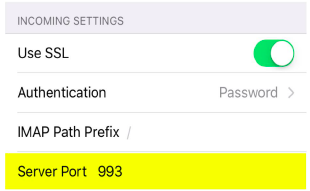
Click Done to go back to the account screen. Then select Advanced.
Scroll down until you see Incoming Settings and check to make sure that the port is 993.
Select Account at the top of this screen, then click Done.
Congratulations! You have completed the setup of your email account!

Still have questions? Don’t hesitate to call or contact us at support@perfectpatients.com. We look forward to hearing from you!